Category Archives: TNT's

Crying uncle

Well, my friends, I think I have to give up the ghost on my tweed jumper.  I just can’t get it to fit around the girls right and now the fabric is looking a little forlorn.  Remember, this is how it looked last time:

  1. I tried shortening the fisheye darts — only helped a little.
  2. Then I tried letting out the side seams — no change.

At this point, the fabric doesn’t look good any more, so I didn’t have the heart to take pictures of what it looks like now though.  Trying to take out teensy tiny stitches out of a tweed just about did me in and definitely ruined the tweed.  And for some strange reason, the dress keeps hiking up in front so that the shoulder seams go behind my shoulders a bit.  I think that’s why the darts look so high.  But I can’t figure out why it’s doing that. 

I also can’t figure out why this iteration of a TNT is so drastically different from my other two.  The tweed is actually pretty lightweight and not all that different in thickness from the brocade I used for my fancy dress, so I can’t imagine that it’s a turn of the cloth issue as some of you have suggested.  So strange.

Anyway, I am just going to call it a wadder and move on.  I am pretty disappointed though.  As for the next project?  I have so many end of year projects on the docket that I am a little at a loss as to what to start on next. 

We’ll see what I feel like starting tonight. 

Wishing you a sewing day without wadders.

WTH!!!

People, can you see what’s wrong with the above picture (other than the crappy iPhone quality)?

Two nights ago, I tried on my tweed jumper (aka B5147) and was faced with double trouble.  Let’s just say the girls are not happy.  Now do you see what’s wrong?  There is major boob smooshing going on and not the good kind.

How did this happen?  This is my TNT folks.  Not some random pattern I picked up at a bar.  B5147 and I are going steady.  I thought there might even be a ring in the near future.  I feel betrayed!  Suddenly, B5147 doesn’t return my calls and now this!  Ok, my metaphor is losing steam here.  Seriously though…  My bust dart is about 1 inch too high (looks like I have low hanging fruit, hah!) and the fisheye dart looks too high too. 

What do I do in this situation???  Is it a simple matter of sacrificing the side seam allowances and then the dress will fall to the right level with some room for the girls?  Or do I have to actually release and lower the darts?  FYI, the dress fits everywhere else.  Just the bust is the problem.  Please let me know your suggestions.

I guess all the bad food choices and little exercise are catching up to my meager metabolism, not to mention the too little sleep I’ve been getting of late.  *sigh*  Gravity and aging are not my friends.

In disgust, I turned to knitting Jack’s sweater last night and was hit with another disaster.  My gauge swatch had lied to me and my knitting was 3.5 inches too narrow.  (Is there no loyalty with yarns and fabrics any longer?  They’re just like men!)  I had to frog the entire back and start over.   However, now I am confident I am on the right track with Jack’s sweater, although I am not entirely confident I will get either project done by Sunday when our photo shoot is scheduled.  😦  

Hope your yarn and fabrics are treating you nicer than I have been treated this week.

I can haz two colors?

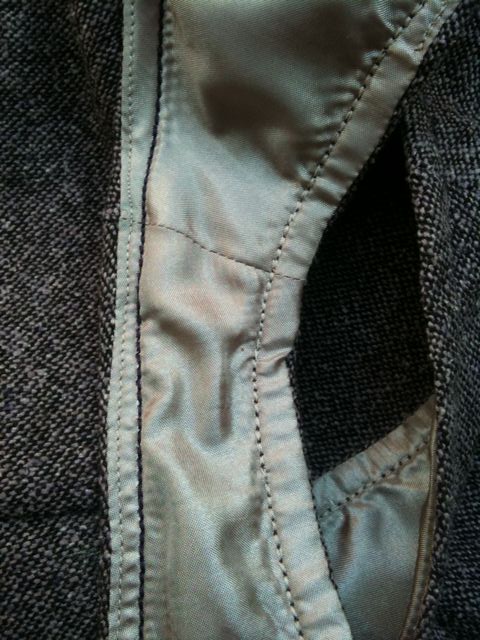
 As I mentioned in my last post, I am making some new design choices with my latest B5147 dress.  I am using a lightweight plum tweed from Paron’s as the fashion fabric, some unknown type of lining (purchased from P&S fabrics).  My thinking was that since this was tweed, I would make a more casual dress, really more of a jumper, as I know I will wear it with a shirt or turtleneck underneath it since the pattern is sleeveless.  As I was sewing the lining to the fabric at the neck, I was inspired to add topstitching to the neckline and armscye.  I thought it would punch up the sporty look of the tweed.  The topstitching combined with my exposed zipper in the back would make this dress look completely different from my silk twill version or the dressier one I made for my cousin’s wedding.

Anyhoo, getting on with it.  I had changed the thread in my machine from the yummy plummy thread to the one that matched my lining.  So when I went to topstitch, I changed it again to the yummy plummy one.  I started to merrily topstitch away when I remembered that I had read somewhere that I could use two different color threads when sewing (one color for the needle and a different one for the bobbin).  What?!?!  You don’t have to use the same color for both the bobbin and needle?  Sacrilege!  Heresy!

Cue in the gratuitous LOLcats and the muse for my post title…

image from icanhazcheezburger.com

Well, it was too late to change my bobbin thread for the neckline topstitching, but I did change it for the armscye topstitching and I love it!  I know no one will ever see it but me and my dry cleaner, but I know that it’s there and it makes me happy.  Going forward, I will make sure that drapery matches the top fabric and that the carpet matches the lining if you catch my drift.  😉 

neckline stitching on left and armscye stitching on right

In exposed zipper news, it took me a good hour and a half to two hours to insert that sucker!  But insert it I did!  I have more to discuss on the exposed zipper front, but that will have to wait until next time.  All I have to do now on this dress is hand sew the lining to the zipper tape and sew the vent/hem.  Then this puppy will be done and ready for prime time!  I hope to wear it to work this week and on Sunday when Jack and I take our annual pictures.  🙂  

Happy sewing everyone.

Feeling exposed

Saturday night I was happily sewing along on my latest rendition of B5147 in plummy tweed.  I had just finished all my darts (all six of them on the shell) around 10:30pm.  I thought for a moment about starting the darts on the lining when I realized that I didn’t have matching thread for the lining.  Quelle horreur!  Not only that, but I didn’t have a matching zipper! 

That’s the problem with having a notion stash my friends.  You just assume you have all the supplies for every project under the sun.  Well, guess what?  Sometimes you don’t.  So that was my deciding factor to pack it up for the night. 

On Sunday, Jack and I headed over to Purl in Soho to peruse the yarn selection for his annual sweater vest.  I know I said that I probably wasn’t going to make his sweater this year, but I booked the appointment for our yearly pictures and I just can’t stand the thought of not having Jack in one of my sweaters.  Call it narcissism if you must!  After last year’s debacle, I made sure to get a color fast yarn that’s easily washable.  I chose Cascade Superwash 128 in a yummy forest green and an equally yummy ivory.  I still haven’t decided how to use the ivory yet, but will kind of “feel” it as I go I think.  

Jumping into the future:  Since I am an instant gratification person, I had to cast on Sunday night to see how the yarn looked.  I’m using Ann Budd’s book for the sweater vest pattern with a few modifications.  Me likey…

in progress: back of sweater


Back to the past:  Unfortunately, Purl didn’t have a large selection of thread and zippers for my new dress, so Jack and I had to walk over to P&S Fabrics to get those items.  P&S is my go to neighborhood fabric/notions store.  While their fabrics aren’t necessarily the best, you can find some bargains there occasionally and they have a decent selection of notions, buttons and yarn.  I started to panic, however, when they didn’t have an invisible zipper to match my plummy tweed.  What’s a girl to do without an invisible zipper in this modern age???  (Read: I have no idea how to insert any other kind of zipper.)  Near the zipper section, P&S has a few grubby bins filled with one-off zippers, some of them regular zippers that you could use as an exposed zipper.  Since I was already envisioning this dress as more of a jumper than an elegant sheath dress, an exposed zipper might be just the ticket!  There were two that I liked in two different lengths, 18 in and 20 in.  The pattern calls for a 20 in zipper, but an emergency call to Carolyn confirmed that an 18 in zipper would do just as well; I’m not an amazon being only 5 foot 4 inches tall.  And as it so happens, the 18 inch zipper (the one at the top of the picture with the deeper purple tape) is the one I like best with my fabric. 

Of course I have no idea how to insert an exposed zipper.  And of course, I went searching on the internet for a tutorial on how to insert one.  The tutorial I like best so far of all that I found was on the Husqvarna site (click on the exposed zipper tutorial).  That’s the one I will use tonight.

I sewed the darts in the lining last night and started to attach the lining to the dress at the neck.  I had a huge moment of inspiration at that point and am adding more detail to this simple sheath dress pattern to make it my own.  But that’s a post for another day…

I know.  I’m such a tease.  😉  

Happy sewing everyone!

Purplicity

A SHORT POP QUIZ

  1. Can one really have too much purple in their wardrobe?  A: I think not!
  2.   What do my recent wool coat and my soon to be new sheath dress have in common? A: Plum thread.

 A pleasant happenstance this evening, while choosing thread for my new sheath dress, was that I didn’t need to rethread my sewing machine.  Why?  Because the thread I used for my coat was just the right shade for my new sheath dress.  I think I have just enough thread for the project too.  How cool is that?! 

I don’t know if I’ve admitted it before, but purple is my favorite color.  And while I haven’t indulged that much in it in my wardrobe in the past, I have begun to notice a purple trend in my stash lately.  Oh, I may have conveniently forgotton that one of my winter coats is purple.  And did I mention that I recently bought purple corduroy to duplicate my father’s jacket?  I don’t think I am going to use that corduroy for this jacket now though.  I mean, how can I get away with 3 jackets/coats that are purple???  That’s just a purple overload. 

I may need to join Purple Lovers Anonymous.

I made decent progress on my dress tonight.  I could have pushed my limits and finished all the darts on the lining too tonight, but I am sensibly knocking off early.  I don’t really have any thread that matches my lining and I need to buy a zipper, so I will just wait until I can pop over to P&S tomorrow and check out their selection of thread and zippers.  I like to be matchy matchy like that.  That’s just how I roll. 

Happy purplicity everyone.

A TNT it is then

And so my next project will be my TNT sheath dress, B5147.  Are you guys bored yet?  😉

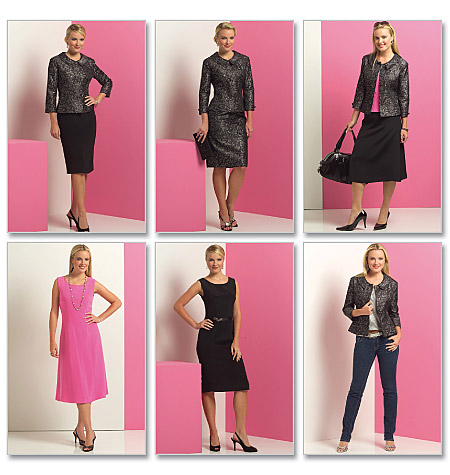
Butterick 5147


This time I am using a tweed I purchased from Paron’s at the NY Shopping day.  I loves me a good tweed.  Remember my tweed Burda skirt and how I enjoyed pressing that tweed and what great pleats it made?  Ahhhhh….  This tweed is in the mauvish/purple family.  I know you all are shocked by this color choice, right?

I cut it out on Monday night, but was sick yesterday.  Unfortunately, I won’t be able to get to it again until Thursday, so this won’t be the quick palate cleanser I thought it would be.  But it will still be easy.  This time around I plan on making a few more changes to the TNT:

  • I added back some of the armscye that I had taken away on the dress for the wedding and will sew the side seam a little tighter right under the arm.  If you’ll remember, I showed a little too much fat in that area.  I was trying to take out the gaping there, which I did, but then ended up with a bit of a freak show as well.  I will just tighten it up at the side seam instead, thank you very much.
  • I am putting back some length to the bottom hem.  I just feel more comfortable with longer skirt. 
  • I am definitely keeping the lower neckline though.  I like it on me.  It’s still office appropriate, although I will most likely wear this with the Burda turtleneck I plan on sewing next.
  • I am also going to reduce the width of the front fish eye darts that I increased for the dress for the wedding.  Since I know I will be wearing something underneath the dress, I don’t want it hyper-form-fitting.

It feels good to be sewing again. 

Happy sewing everyone!

Alterations

I found out last night that I didn’t make it to the finals of the PatternReview Natural Fibers contest.  I am a little disappointed, but not surprised; the other entries in the silk category were stunning. 

But in more exciting sewing news…  I finally started my dress for the wedding next week, another iteration of B5147.  It’s probably going to be a fingernail biting race to the finish.  Hey, maybe I should hire a play-by-play announcer.  “Will Elizabeth finish the dress in time for her cousin’s wedding?  Will she be hand sewing the hem on the flight?  Stay tuned next time to find out!”  Hahah!

So, I think part of the reason for my procrastination, I mean hesitation in starting this next dress was that I had to transfer all my alteration changes to the pattern and then cut out 3 fabrics (the underlining, the lining and the fashion fabric).  I have decided that tracing and cutting are my least favorite activities associated with sewing.  Can we get to the sewing part already??? 

If you will recall, the changes I made to the B5147 sheath dress were to deepen the neckline, decrease the shoulder strap width, change the shape of the armscye and increase the fisheye darts for a more fitted look and a bit more dressy/evening-ish look.   Once I transferred the change markings to the original muslin, I found I had a problem.  Can you see it below?

The pattern wasn’t flat.  I had known that I would have to change the side seam somewhat because of the wedge I added, but I didn’t expect that the pattern wouldn’t be flat.  As you can see above, there’s a pouf on the CF fold edge and the CF fold was no longer straight.  That’s not a very practical CF fold then, now is it? 

My first thought was to make a perpendicular cut on the CF fold line and then fold out the pouf until it was flat, but then I would have had to distort the fish eye dart.  Also, by doing that, I would swing the CF line out by almost 4.5 inches.  Then I would have to completely redraw the entire skirt of the dress, both sides.  Needless to say, I was very frustrated, and had no idea how to proceed. 

My next thought was to call Thea.  But as we all know by now, Elizabeth is a visual person.  So Thea’s explanations over the phone were next to incomprehensible to me. 

Next thought?  Wait for it… it’s brilliant.  Consult one of the many fit books in my sewing library.  You know, the ones I haven’t read at all?  The first book to find its way into my hands was Nancy Zieman’s Pattern Fitting with Confidence.  I looked at the section about increasing a dart which is how I got into this whole mess in the first place.  I won’t go into great detail about her methods but the gist of this alteration is you have to increase the length of your pattern by the amount you increased your bust dart.  This makes total sense.  When you increase the bust dart, you are actually shortening the side seam of your pattern once the dart is sewn.  Remember, if you make a change in one place on a pattern, you will most likely have to make a change elsewhere to maintain the integrity and shape of the pattern.  Nancy (we’re on a first name basis now that I’ve actually opened her book) uses the pivot and slide method.  Basically you move around the original pattern making marks on a blank paper to create a new pattern with your own alterations.  So for the increase a bust dart instructions, you determine how much you will increase your dart and use that measurement to increase the length to the pattern piece.  This was a lightbulb moment for me.  Essentially, that’s what Thea and I did with the wedge we added at the side seam to keep the hip curve in the right place after increasing the dart.  But I needed to add the length across the entire piece, not just at the side.  So the wedge became a rectangle added below the dart but above the hip curve.  Ta da!

As you can see in the picture of above, I had to redraw the fisheye dart after adding in my rectangle (that’s the fisheye dart that I widened at the top under the bust so I had a more fitted look in front).  Now I didn’t sew this up again, but I did pin up the bust dart and made sure the front side seam matched the back side seam all the way from the armscye to the hem.  And it did.  Perfectly. 

I made some progress on my dress so far.  I cut out the fashion fabric and the underlining.  I basted the front pattern pieces together with silk thread and staystitched the neck and armscyes.  Next up is basting the back pieces of the underlining and fashion fabric together then stay stitching and cutting out the lining.  Since the fashion fabric I’m using  is very different from the silk twill I used for the last version of this dress, I am only going to baste the side seams to check for fit one last time before I sew this puppy up. 

I have four more evenings and three nap times (Jack’s, not mine) before the wedding.  I think I might just be able to finish this.  It will definitely be a nail biter though!

Tonight though, this momma has a date!  Should I wear the Christian LaCroix skirt or the silk twill dress?

Happy sewing everyone!

Super-duper excited

about my B5147 morph from day into evening-wear project!!!  

So I know Robin’s been experiencing drama here and here with her first version of B5147 and I can’t keep my hands off tweaking the bodice (sounds almost r rated!). But I am excited to report that I have found nirvana with my fit for this bodice.  Here are the changes I made to the bodice to make it more fitting for evening wear (get it?  “fitting”?) AND to be more flattering fit-wise too: 

  • scooped out the neckline by 3 inches to give a more evening look.  I came at this measurement by trying on my silk twill version and measuring down from the existing neckline to where I wanted the evening dress neckline to be.
  • sculpted out the side of the shoulder strap/armscye area to give a more evening look.  Adjusted the width of the back shoulder strap to match the front.
  • widened the top portion of both fisheye darts to pull in the bodice under the girls, thereby giving a more flattering silhouette to the waist of bodice.  I am really proud of this change working out well because I just kind of eyeballed it.  No math involved!
  • increased the bust dart again by 1/4 inch on the top to reduce draglines at the side.
  • added 3/4 inch wedge below the bust dart to restore length to the side seam and maintain integrity of the hip curve after altering the bust dart.
  • pinched out a 1/4 inch of the outer shoulder seam for the front only, tapering to the inner shoulder seam to reduce gaping of the armscye.

B5147 front pattern altered with neck, dart and armscye changes


B5147 back pattern with shoulder strap altered to match front


fisheye dart widened


Bust dart increased and wedge added


I might need to tweak the following on the final dress, but will do it during construction, basting as I go: 

  • take a titch out from the front at the armscye side seam, maybe a 1/4 inch tapering to nothing at the dart to reduce armscye gaping.
  • pinch out the same amount from inner shoulder seam to reduce neckline gaping.
  • straighten up side seam after adding the wedge under the bust dart.

I should have taken a picture of the muslin on me, because I was really happy with the fit, but I didn’t insert the zipper.  I just had Thea pin up the back at the seam allowance to mimic the zipper.  Then I forgot to take a picture after we were done with our fitting.  Sorry!  Suffice it to say, that I am very happy with the fit of this dress now.  And I love that I have an evening version of this sheath dress. 

Unfortunately, I won’t have time to sew until next week as Jack and I have a very full weekend planned.   But at least I have figured out all the major stuff and can just cut and start sewing next week.  I am going to underline the brocade with silk organza as it is quite a loose weave and bags out if you just look or breathe on it.  That will add some time to the process, but it will be well worth it in the end.    

Happy sewing everyone!

B5147 – The Silk Twill Edition

I finally finished it!  But boy do I understand UFO’s now.  If you don’t finish it right away, it is likely to languish for an indeterminate amount of time.  It’s not that you don’t love it anymore.  It’s just about lost momentum.  If I hadn’t decided to enter this dress into the Pattern Review/ASE Natural Fibers Contest, I might not have finished this dress for a long time. 

Without further ado, some pictures courtesy of my sister, Meredith.  Although there was a lot of pushing and biting during the photo shoot (our kids, not my sister and me), we managed to get a few shots worth posting.  One note about the pictures first, though, if you will indulge me: I could not get the head on picture to look flattering no matter how I stood.  Trust me when I say that it is much more flattering in person.  Not sure why it looks the way it does.  My sister, a kind soul, said it was the lens she was using. 

No, I did not put in the hook and eye yet.  I hate sewing those on.  But I will.  Maybe…  Someday…  Maybe…  Oh wait, I’m submitting this for a contest.  Ok.  I will.  *shrugging resignedly*

With this version of B5147, I made the following changes:

  • increased the bust dart, at the bottom of it only, by about 1 cm, thereby taking out some (but unfortunately not all) of the drag line that points to the bust area.  Partial success.  May increase the dart more on the next version.
  • I staystitched both the neck and armscye area on both the lining and silk to maintain the shape integrity.  Success!
  • hemmed the lining before finishing the slit lining for a cleaner finish.  Me likey!
  • zig zag finished the silk hem allowance. I thought serging it would be too bulky and show through whenever the dress is pressed.  I thought I would hate the zig zag finish and that it would be inadequate for this fabric, but was pleasantly surprised how well it worked and looked.  An oldie but a goodie method!
  • Again, I hand stitched the hem.  I was worried that even hand stitching would show on this silk twill, but, again, I was pleasantly surprised that it did not.  Yeah!

Some interior pictures… 

finished slit with hand edgestitching and slipstitching

hand slipstitched lining


Now that I have made 3 iterations of this dress (including the muslin), I have some doubts as to it’s viability in my TNT project.  And in case you are wondering at this point, yes, I am very picky. 

Here are my thoughts:

  • even if I adjust the bust dart, I think the shape of the shoulder straps/armscye is wrong for me.  It needs to be a thinner strap on the outside (meaning closest to the arm rather than the body) and/or the armscye needs to be cut in (closer to the body) a bit more.  The shapelessness in that area makes me look larger than I am.
  • the neckline, while being very comfortable for me, is probably not as flattering as it could be.  A V-neck is much more flattering to C-cups and larger as it does away with the “bag o’ boobs” look.

Can I change these things myself?  Maybe.  But, as I have already found out, sometimes you have no idea how a change in one area might affect another completely different area.  And I really don’t want to experiment for months on end.  I’d rather just try to find a sheath dress with the elements I now know that I want and muslin it for personal fit from there. 

What’s next?  I have some baby stuff to make, a dress for my cousin’s wedding, and fall coat.  That’s a lot to accomplish in August, but I gotta try!

Wish me luck!

Muslin Surprise

Thea was over last night and we worked on fitting my muslin for the B5147 dress.  Remember how I said that it probably only needed a swayback adjustment?  Well, I was completely off the mark.

If you will recall, I needed to set in the zipper better, so I basted that in more accurately and tried it on again.  As soon as I saw it on me again, I knew no swayback adjustment was necessary.  Then Thea went to work on helping me fit the muslin.  Here’s what we did:

  • raised the back 1 inch (need to remember to increase the bottom by one inch to compensate)
  • added 1/4 inch at the side seams for a total increase of 1 inch
  • my left hip is much straighter in shape than my right hip so I straightened the curve and took in that side seam a little more because it was pooching out
  • lowered the bust dart about 3/4 inch and changed the angle a little lower as it was too high for my bust
  • raised the hem by about 6 inches (man! this dress is long!)
  • changed the back sleeve shape decreasing it about 3/8 inch
  • decreased the side seam under the arm about 3/8 for a closer fit (might add some back as it’s a little tight across the back)

Here’s what the muslin looks like so far.  We only made the changes to one side of the muslin (my left, your right as you look at the picture), although we let out both side seams and raised the back on both shoulders originally.

It looks pretty good as is now, but I still want to tweak it a little further.  I think I overfitted in some areas and removed too much ease.  While I can still sit down in the dress, it’s a little too fitted looking and for my liking.  Also, I still have drag lines pointing to the bust.  I have solution to that (see below).  So here’s what I have to do next:

  • add an inch to the hem of the back pattern piece to account for raising the back
  • add a complete 5/8 SA to the pattern pieces since I let out the side seam by a 1/4 inch
  • add back in a pinch at the left hip SA due to over fitting
  • add a little less than 1/8 inch to bust dart tapering to the point
  • add back about 1/8 inch to under arm SA to get better ease for the back
  • now that the back is raised, I have to cut down the back neck 1 inch to the original placement

So once I have made all those changes and check the fit one last time, I am ready to use this muslin as my pattern.  Once I’ve made sure all the marks are made, I can cut out my good fabric.  I still haven’t chosen which fabric I will use to make my first iteration of this dress.  So many to choose from!  But that’s a happy problem.  And folks, yes, this will be my TNT sheath dress pattern.  I love it!!!

Thoughts on the fitting process: 

  • I’m really glad that I had Thea to help me fit this dress.  I would never have known to raise the back at all; it would not have occurred to me in a million years.
  • I think you really need a fitting buddy, preferably someone who is knowledgeable, if you’re a beginner like me.
  • the change you need is never the one you think of initially, at least for me.  This is NOT intuitive for me at all.
  • It’s almost never just one change.  One thing leads to another to another.  😉 

But the most important lesson learned?  Fitted garments are flattering, no matter what your shape!

Happy fitting everyone!