Category Archives: Thea

Muslin-y Pictures of S2311

Last night’s session with Thea was very successful.  I continue to be excited about this coat.  I just adore this pattern.  Did I mention that it is well-drafted???  And the collar/lapel is just about as perfect as can be.  LOVE. THIS. COAT.

So, I realized some errors I had made, but it’s all good.  No animals were harmed in the making of this muslin.  😉   I forgot I had changed the seam guide on my Featherweight from 5/8ths to 1/2 inch, so all my seam allowances were an 1/8th off. 

Oh, and I figured out why my bobbin thread kept breaking.  Now this is just a theory as I have not really researched it, but I think the needle position must be in its highest position when you pull out your work.  I think the way the machine works is that having the needle position high changes the way the bobbin releases the bobbin thread.  Oh maybe I’m on crack here, but it’s just a theory.  I experimented last night with keeping the needle up at its highest position whenever I removed my work after a seam and I had no problems whatsoever with the bobbin thread all night.  So, I think I’m on to something here.  However, this mild success in using the Featherweight did not convince me to use it for this coat.  I am still going to use my Emerald 183.  I think I need to practice on the Featherweight with less complicated, less important projects first before I sew something like a coat.

Thea helped me fit my coat.  She agreed with me that the fit was basically fine but I could use some shaping in the back to remove some of the bulk there.  The pattern provides a center back seam, but there is not much if any shaping in it, so we added about a 3/4 inch of shaping out from the waist tapering to the hem and yoke.  It looks great now.  We inserted the sleeve pretty easily.  Thankfully there is not an excess amount of ease in the sleeve cap, so very little easing was required.  There was also easing for the elbow which I love.  Gives great shaping to the line of the arm as well as being practical for something pointy like an elbow.  I should mention that I was mistaken about the pattern calling for sewing on the sleeves in the flat.  I just misread them because they have you jump around the instruction sheets from Coat A to Coat B instructions. 

Thea also helped me figure out how to attack the back yoke to the front and collar better.  The pattern itself is missing some markings, so that was part of my problem. The other was not know how to properly sew a squarish u-shaped piece to a straight piece.  I will explain that later.  Ingenious method though. 

Without further ado, here are the pictures of the muslin on me!  I wore a suit jacket to fill out the coat a bit.  I am really pleased with the fit and look of this coat and can’t wait to start cutting out the purple wool.  Please ignore the goofy faces.

Note: the muslin is really stiff. the wool has a softer drape.

Again, the back will be smoother in the softer wool

Happy sewing everyone!

Pattern Review – Butterick 5147

Butterick 5147


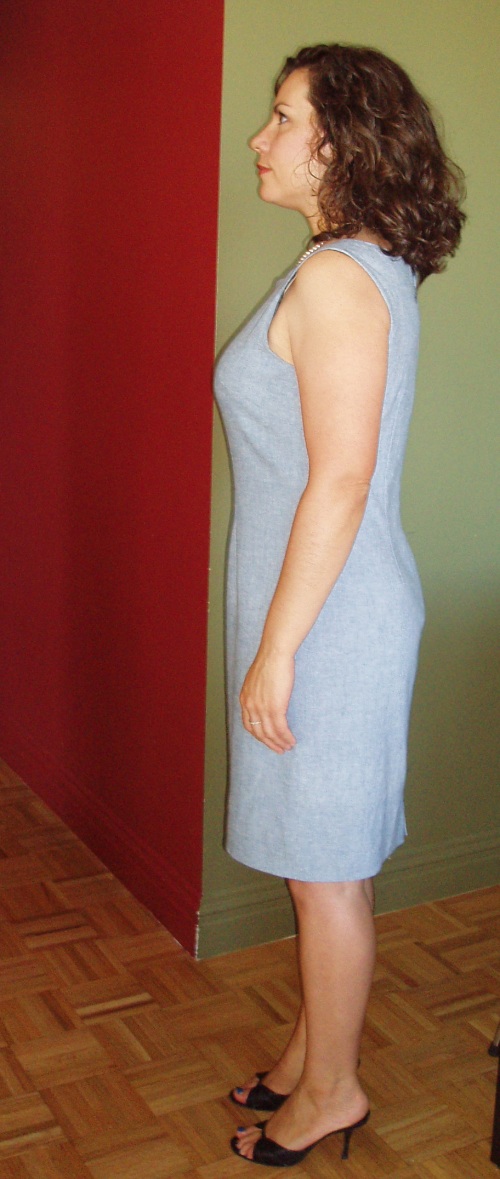
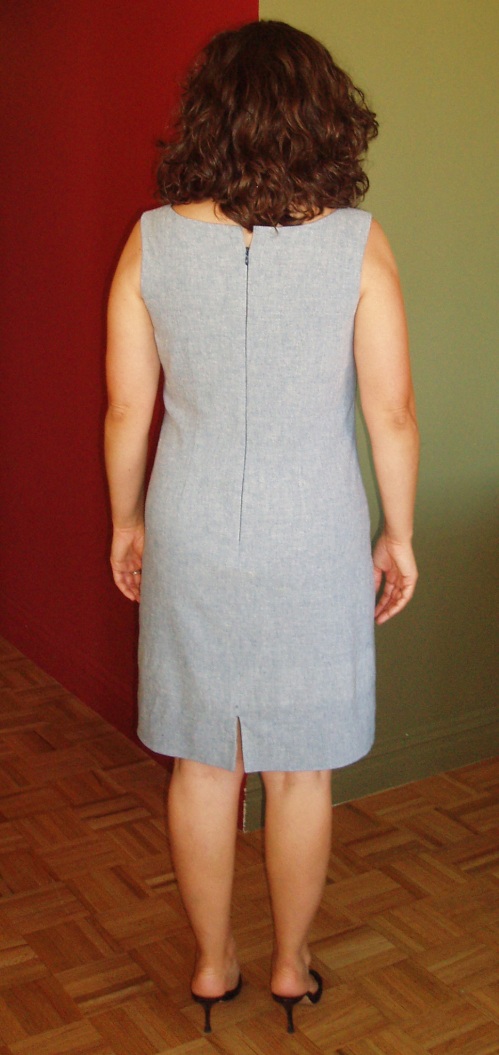
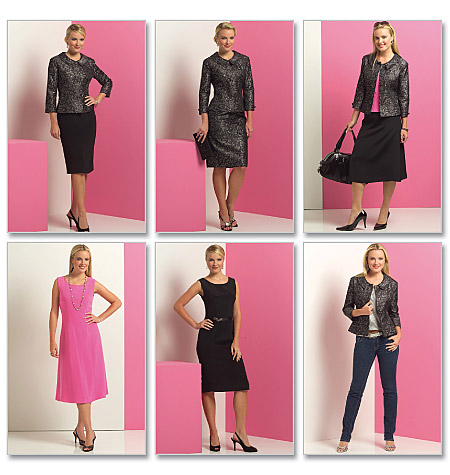
Pattern Description:  Lifestyle Wardrobe: Misses Jacket, Top, Dress, and Skirt. Slim fitting dress C has front and back darts, back zipper and back slit, length is 2 inches below mid-knee.

Pattern Sizing:  BB (8-14) I made the size 14 with some small alterations (see below)

Did it look like the photo/drawing on the pattern envelope once you were done sewing with it?  Yes, but not as close fitting.

Were the instructions easy to follow?  

  • Yes for the most part.  I liked the order of construction they set out as it provides a beautiful clean finish on the inside.  However they do not tell you to stay stitch the neck and my neckline stretched out.  I should have listened to my inner sewing voice and put in stay stitching.  
  • For the fish eye darts, I recommend starting the stitching line in the middle of the dart rather than at one of the two ends (thanks to my commenters for this tip!).  This allows for more accurate sewing at both ends of the dart for a beautiful taper resulting in no bubble at the tips.  Don’t forget to make your stitch length smaller at the ends of the darts! 
  • The instructions for finishing the slit with the lining and dress hem joined together are great!  I didn’t understand them at first by just reading them, but if you follow them step by step, you’ll understand.  I am visual person, so reading wordy stuff doesn’t always make directions apparent for me.  My one caveat about the slit instructions is that you should finish the raw edge of the hem long before you get to this step, like before you start constructing the dress with zigzag stitching or by serging.  Ask me how I know! 
  • One more note:  Understitching the lining of the slit is really hard to do on the machine.  It’s doable but difficult to maneuver all the fabric into just the right position.  It’s far less of a headache to just understitch it by hand and quick too. 

What did you particularly like or dislike about the pattern? 

Likes:

  • I liked that the pattern was pretty true to size according to the measurements given on the pattern envelope. After the 6 inch debacle, it was such a treat not to have a nasty surprise when making the muslin on this dress.
  • Love this sheath dress.  I think it’s very flattering (much more so in real life than in the following pictures) and is such a great staple to have in the work wardrobe.  Depending on the fabric you use, this dress can be a statement piece or an elegant foil for some great accessories.  I think everyone looks well dressed in a well-fitting sheath dress.
  • I love this neckline.  It’s not too high, not too low.  I hate necklines that are high and rest on my clavicles (I feel like I’m being strangled!), so this neckline is just right for me and Goldilocks.

Dislikes:

  • None!

Fabric Used:  I just bought this fabric from Paron’s last weekend.  I am so proud of myself for using it within a week of buying it.  It’s a stretch chambray.  Not to get all philosophical on you, but I liked the juxtaposition of using a traditional work horse fabric for an elegant sheath dress.  I wore it with pearls today and I think by accessorizing the dress like it was made with silk really elevates the fabric from it’s humble origins.  I love chambray; it’s so soft and comfy.  I do have to mention, however, that I am not a fan of stretch wovens so far.  They are a little tricky to work with as they grow as you handle them.  I had to take in the side seams to accommodate the growth during construction, despite having made two muslins beforehand.  Also, the feel of the fabric doesn’t feel as natural as a plain cotton would, a little rubbery.

Pattern alterations or any design changes you made:  During the muslin stage, I had Thea help me with fitting, as I mentioned in my last post, the changes we ended up making were not even close to the ones I thought I would make.  I thought all I needed was a swayback adjustment, but we took out an inch from the shoulders of the back pattern piece.  The strange thing about this was that it didn’t significantly change the shape of the armscye AND I didn’t need to add that inch back in at the back hem.  Go figure!  Then added a ¼ inch at the side seams to add a full inch of ease to the dress.  Also, my left hip is not as curvy as my right, so I straightened that curve and took it in another ¼ inch to fit my hip better.  As I mentioned above, my stretch fabric grew with handling so after I basted in the side seams, I had to take in both side seams another ¼ inch again to accommodate the fabric.  The only further changes I might consider making is making it a little more fitted like it seems to be on the pattern envelope.  But I will decide this after wearing it for a full day.  It’s comfortable as is now, but maybe a little more fitted might be even more flattering?  Who knows.  It could just end up emphasizing the pooch and who wants that?  Not me!  I wish I worked with people who sewed, so I could ask their opinion.  *sigh* 

Would you sew it again? Would you recommend it to others?  This dress  was made as part of the Butterick 5147 Dress Sew Along that Carolyn and I started (still going on for another few weeks – please join!)  It was on my list to try as a potential TNT (tried n true) pattern for my work wardrobe.  Since I consider it a success, I will definitely be sewing it again and again.  There are only two pattern pieces and four darts.  Can it get any simpler than that?  I definitely recommend it to others.  I think it will flatter most figures after adjusting for each individual’s fit.  And the directions are great (aside from leaving out a couple of important steps mentioned above).  I definitely think a beginner could handle this pattern if they have a good sewing reference sitting beside them. 

Conclusion:  This dress has become my second TNT in my TNT quest for a work wardrobe.  I love the fit, the elegant silhouette, and the fact that the fabric is the star of this pattern.  You will not look like you are making the same dress over and over if you use vastly different fabrics.  I plan to make this again right away using my new silk twill border print (also bought at Paron’s during the same visit last week).  Can’t wait!!!!!  Also I absolutely adore the jacket included in this pattern.  I hope to make that sometime in the near future.  I have a lot on my plate now, but that jacket is definitely on my horizon.

Now for some pictures…  Thanks to my sister taking them this morning even though she was rushing to get out the door!  This is how I wore my dress at work today.  I don’t have any construction pictures as I didn’t do anything too different or awe inspiring to document them.  Besides, this dress is all about getting the right fit, not how you hand sew the hem. 😉 
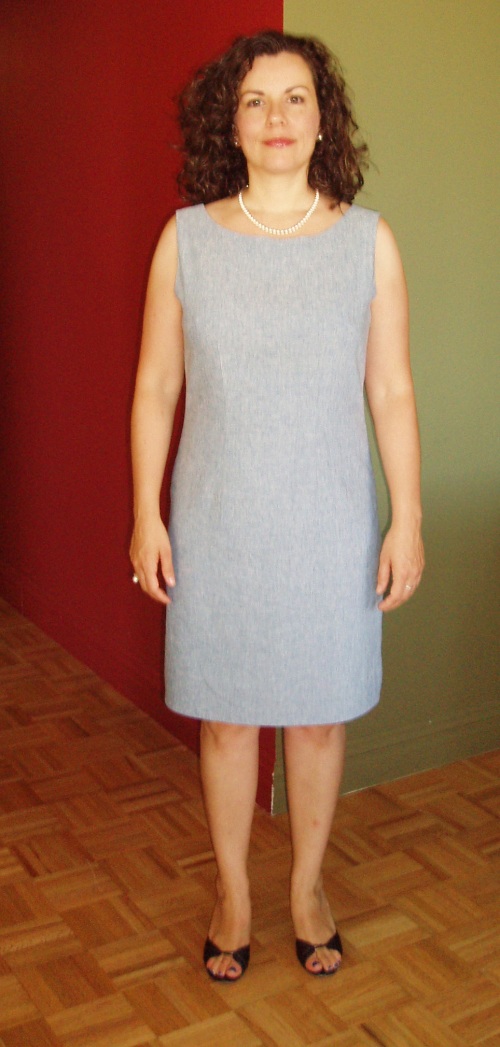
I’m going back to remedial sewing school with Thea this weekend and cutting out my precious silk twill under her wise tutelage.  I had some grain issues with my first iteration of this dress and I don’t want to chance ruining my silk twill dress.  Hopefully, by this time next week, I will have another new Butterick 5147 dress to show you all!

Happy sewing everyone!

Did I scare you off?

Whoa! I think I might have scared some of you off with my last post detailing Thea’s Challenge. Thea had some great ideas as jumping off points for a patternless project and included them in the comment section of that post, but let me paste them here as well:

“I gave Elizabeth this challenge to free her from the confines of what we think sewing should be. To be silly, have fun and throw caution to the wind.
Be creative. No rules, be as free as you like.”

  • Give a garment a back closing instead of the front closing it’s supposed to have.
  • Sew big buttons all over a garment.
  • Look at obscure patterns and see how they’ve drafted the pattern pieces. A good one to look at is Issey Miyake’s Vogue pattern – V2952.
  • Gather up fabric here, there and everywhere, on a garment.
  • Turn a skirt pattern into a top — or a top pattern into a skirt.
  • Have uneven hems.
  • Put frills in places you wouldn’t expect to see them.
  • Cut the fabric on the garment in many places and then sew the slashes up in different colored threads — on the outside.
  • Take two garments — that you don’t especially like — and combine them into one.


Here’s the idea I had for my project.

image from maxstudio.com

I saw a shirred knit skirt last weekend and can’t get it out of my mind. The one I have posted above is cotton voile, but I would make mine in a knit. I think that’s the perfect weekend skirt for running after possessed 3 yr olds traipsing after wayward toddlers. I have tons of knits in my stash that I could use. I just have to pick one out that will go with a bunch of my solid t-shirts. As I recall, using elastic thread shirrs the fabric about 1/2 its original width, so I just need to figure out my measurements for this skirt and decide how wide (vertically speaking) the shirred section will be. I think I will do a serged rolled hem on the hem. Super easy. It’s not as creative or out of the box as Thea was suggesting, but it is patternless.

If I hadn’t already had this skirt in mind, I would make a skirt using Thea’s fourth suggestion of gathering up fabric here and there. I think that would look really cool. Who knows, maybe that’s next. One can never have too many toddler chasing skirts.

So I ask you again, who’s with me? 😉

Thea’s Challenge


image from purlbee.com


After Thea helped me “draft” Haley’s birthday dress and I posted the pictures of Haley wearing it, Thea emailed me with an idea.  She suggested that we should all do a small project without using a drafted pattern. 

Thea said, ” Just see a design in your mind, take the fabric, cut, sew, try on and tweak.  No sewing rules.  No perfect finishing.  A project where only the outward appearance matters — and it only has to please you.  It can look as wild as you like, with mixed fabrics if you like.  Something that you would wear if there were no rules, regulations and nothing mattered.  Total playtime!”

So what do you think?  Do you want to join me in taking on Thea’s challenge?  If so, I will set up a shutterfly album so that we can all post our pictures.  I already have an idea for my pattern-less design.  I think the point of this challenge is to be spontaneous with our sewing and to not overthink it.  There’s a lot of inherent self-doubt in sewing.   Well, at least there is for me.  And I think this challenge will prove to us that we can trust our instincts.

So who’s with me?

Birthday Dress Pattern Review

Since Haley had her birthday this weekend, received her presents, and opened them.  I can  now show you pictures of the finished dress.  However, I forgot to take interior construction pictures before I wrapped and sent it off, so my apologies for the dearth of those photos.

By all accounts, Haley loves her dress and she looks so pretty in pink.

Construction notes:  I used no pattern for this dress.  With the help of my teacher Thea and some measurements of a RTW dress that Haley already owned, we drafted a pattern for this dress.  The bodice of the RTW wear dress was 18 inches in circumference and the straps were 2 inches in from the sides.  Since elastic thread for shirring cuts the width down by 1/2 I started with 2 pieces of the floral fabric (front and back) 19 inches wide each (1 inch added for SA’s).  I pressed the top of the bodice under twice and used the elastic on top of the hem to secure and start the shirring at the same time.  I shirred for about 7-8 times around until it looked right in length from top to bottom.  I seamed and gathered the solid pink band using my gathering foot, remember my new boyfriend?  In retrospect, I realized that I had forgotten to tighten my stitch tension, so the gathers are not as gathered, but I still like it.  It’s subtle.  Then I added the lace at the bottom.  I bought the lace in Philly when I was there for PR Weekend.  Doesn’t it just take this simple dress to a whole new level?  It’s definitely “one more louder.”  I must give full credit to Thea for turning the straps for me.  I have been very frustrated with my turner, but she seemed to have no problem whatsoever with it.  Hmmm…  I attached the straps and this dress was done!  Very simple.  I constructed the entire dress (minus attaching the straps) in one evening.  I can see a sweatshop in my near future making little girl dresses.  😉  

And here’s little Haley in her dress.  Isn’t she super duper cute?

In other sewing news, I finished my Burda dress and love it.  Lots to tell about that little adventure, but I must save it for another post.  Not sure if it’s work wearable though.  It might be a little too sexy momma for the office.  I’ll have to ask my sister’s opinion.

Happy sewing everyone!

Reframing


I’ve been ruminating again on process.  How sewing is all about process.  How I abhor process and yet keep picking activities where process is the main theme.  And it got me to thinking about how I would rather skip from A to Z without learning about all the letters between.  Z being an expert sewist who makes no mistakes and never has a wadder. 

Although I intellectually understand that mistakes are learning experiences, I still want to be the person who never makes a mistake.  The one who never creates a wadder. 

But what if we reframe the term wadder so that it has a positive meaning rather than a negative one.  What if we thought of wadders as badges of honor.  As proof that we have learned something along the way.  As proof that we took some risks, that we had faith in our abilities.  I look at Carolyn who recently stepped out of her TNT comfort zone and tried a new pattern.  She didn’t like her first dress with this new pattern (although I thought it looked fab), but she’s already changed the pattern and is going to try it again. 

I have always feared failure and wadders, sewing ones or otherwise.  You see, I’m a perfectionist.  Perfectionists don’t like mistakes.  I once told a mentor of mine that I couldn’t possibly be a perfectionist because I wasn’t perfect yet.  As soon as the words left my mouth, I realized that I was one.  Don’t get me wrong, I am not a perfectionist in every part of my life.  I do pick and choose my battles.  High on my list is loading the dishwasher perfectly, but my apartment is far from neat.  I will settle for a zipper slightly off at the top, but not at the bottom.  I will jury rig a lining so that it won’t show below the hem of the fashion fabric, but take a finished garment completely apart to fix it. 

But what does perfectionism do for you?  For me?  Nothing good.  The bad it creates (anxiety, fear, disappointment), cannot be good for me.  In fact, it’s what holds me back.  It’s why I am so slow to start each new project.  It’s why I procrastinate.  It’s why I hired my teacher Thea.  I wanted her there for every project, each step of the way, so I wouldn’t ever have a wadder. 

What is there to be afraid of though?  Am I going to let my perfectionism or negativism stop me from learning?  From progressing from a beginner level to a couture level (who knows if I will ever get to that level, but I will keep trying)?

So, I am going to reframe my sewing world.  I am going to be positive.  I am going to embrace wadders for what they are, as pieces from which I learn a lot, like what not to do or how to do it better. There’s enough negativity inherent with sewing when you throw body image into every aspect, from fitting your patterns to what size you are in pattern sizing.  Why make a learning experience a negative thing? 

What do you think?  This is the question of the day.  Should we reframe the term wadder?  What should we call it?

Happy wadding everyone!

Plain Vanilla

This is the skirt I’m working on right now, Simplicity 2452.  It’s part of my TNT project (the search for work wardrobe basics that fit well, look good and that I can make over and over again).  It’s a simple, no waist band, 4 dart, 3 piece, pencil skirt with vent pattern.  I’ve had my doubts about this pattern along the way, but with proper fitting and the right fabric, I think it can be a winner.  However, as my close friends and family will no doubt attest, I have this habit of complicating things.  I know.  Weird, right?  So I took this simple skirt and complicated it up by adding a lining and thinking I am really smart to add a grosgrain ribbon at the waist to stabilize it.  I’ve added linings before to patterns.  Sure it’s a lot of extra steps, but it’s relatively easy. 

Easy that is, if you use a simple, plain vanilla pattern.  I know what you’re thinking: “Didn’t she just say that this skirt was simple?”  Why yes, I did, but I also said it had a vent, didn’t I?  A vent in and of itself is relatively harmless and quite useful to have if you want to walk while wearing your pencil skirt.  But when you want to add a lining, the vent on this otherwise innocuous and simple skirt becomes quite troublesome.

I was patting myself on the back that I remembered to construct the lining with the vent going the exact opposite direction of the skirt so it would mirror image it when put together, until Thea, my teacher and I started to work on adding the ribbon and lining last night.  That’s when I realized, I should not have finished the vents on the fabric and lining independently of each other. 

Let me tell you who my nemesis is when it comes to sewing: ORDER. OF. CONSTRUCTION.  I know that eventually I won’t make these stupid mistakes, but really.  Why can’t these patterns come with lining instructions????  Is it too much to ask that someone else do my thinking for me ahead of time?  Really???  Sheesh!

Anyway, here’s my advice to the other beginners out there struggling, as I am, each step of the way.  If you’re going to add stuff and be “creative” with your patterns, you better be darn sure that those patterns are of the plain vanilla variety, at least until you have some skillz under your belt.  (Disclaimer: I love vanilla, so I mean no disrespect for this flavor. It’s actually my fave ice cream flavor.)

I am chalking this skirt up as a learning experience.  I am not undoing the vents and then sewing them back together.  I am going to wear it as is dammit.  And I am going to wear it proudly.  No one’s going to know but me and I really stitched those vents closed but good.  It would take hours of unpicking to get them apart again.  I sewed it down with several lines of stitching each to make sure they wouldn’t rip apart.  And boy am I sure now. 

In other sewing news, Thea and I figured out a work around for the Knip Mode skirt.  But I will save that story for another time. 

Until then, happy sewing!

Mish Mash

This was supposed to be the post with the tutorial on lengthening a bodice, but instead it will be a mishmash.  I thought that I had taken all the requisite pictures for said blog post, but upon writing the post, figured out there were quite a few missing pictures.  So, suffice it to say, the tutorial is still forthcoming.  It’s almost finished.  I promise!

Also, I am dying to show you all what I made my Mom for Mother’s day, but she reads the blog, so I can’t.   But since I can’t keep a secret (about presents anyway), I at least got to tell you (and her) that I made her something.  And in her favorite colors (oops!  that might have been a little TMI for a secret).  Oh well…  You’ll all have to wait to see it until she sees it.  Sorry!  But that’s what I sewed this weekend.

Last night, I went through my entire collection of Burdas (back to Jan 2009) looking for a great dress to make for a family wedding scheduled over Labor Day weekend.  I have a few contenders and will post them later.

I also pre-treated my fabric for the Knip Mode skirt.  I will start working on it this week!  I had a lesson last week with Thea and we tweaked the fit of the muslin a little bit.  We did really well with our drafting.  Only minor tweaks were needed. 

So, even though I have been radio silent the last little while, I actually have been working really hard.  Honest!

More to come soon.  Happy sewing everyone!

(Sorry, no pictures for this post.)

FRUSTRATED!!!

In fact I am so frustrated that I am forced to eat my son’s easter basket candy to alleviate some of the negative feelings I am experiencing at this moment. 

So fresh off the euphoria of my recent border print dress and basking in the glow of Thor’s urbanized camp shirt, I thought I had this sewing thing in the bag!  I was getting all proud of myself and a little cocky to boot.

Well folks, I have plummeted down to earth.  My wax wings melted.  I am confounded with this mysterious ritual of which you more experienced sewists speak of with such nonchalance and ease, PATTERN ALTERATIONS. You all bandy about terms like “lengthen the bodice”, “slash and spread”, and “FBAs” like they’re just slicing up a pie and serving it.  Well, I’m here to tell you I am absolutely gob-smacked and mystified. 

I have come to the reluctant conclusion that I am not “an out of the envelope” kind of gal.  Not because I am being difficult and think I”m special.  No, no, no!  I’m just a little lumpy and when you’re lumpy like me, you need to adjust for the occasional lump.  I’ve started to work out more lately, but let’s be honest here — we all know how long it takes to lose weight.  I want to sew now.  I want to wear clothes now.  I have to figure out this whole fitting and adjusting the pattern thing.  PRONTO.

I was going to cut out my good fabric tonight.  But what am I doing instead?  I am spending hours searching the interwebs for tutorials.  Oh, I’ve found tons of tutorials, but none of them answer my specific questions.  Liesl has a great one, but her tute didn’t quite address my particular problem.  I asked my question on PatternReview.com and got a quick response and link to this very dress and the very change I want to make from Michelle, but of course, I still have questions.  As a matter of fact, I am hoping she’ll answer my questions real soon.   😉

Ok, I just got off the phone with Thea.  She talked me off the roof.  Oh and Michelle replied to me again at PatternReview, so I am done ranting this evening.  It’s late and I have to get to bed now.  It took me 3 hours to find what I needed to know (don’t worry, I will share later), and now I have to put it aside for another evening. 

Tomorrow is another day. 

I bid you happy pattern alterations.

Progress on Kwik Sew 3146

I may have mentioned this already, but I had jury duty this week.  My first time ever, and I wasn’t even asked to serve.  I only sat there and read sewing/crafting books.  Poor me, right?  😉 

One of the books I read was David Page Coffin’s Shirtmaking.  It’s a great resource and you should definitely own this book if you ever consider making shirts.  It was highly read-able.  I have a tendency to fall asleep with technical books and I didn’t fall asleep once with this book.  I took some notes while I was reading of things I was surprised to find out among other things: 

  • Iron your shirting fabric, don’t just press it.  Stretch it out in the same direction as the selvedges.
  • Use sew in interfacing not fusible since you wash shirts often.
  • Use a flat fell foot for superior flat fell seams.
  • Insert arms flat and then sew side seams.
  • Match the lightest thread color present in your shirting for your thread.

The first point is something Thea had already mentioned to me when I had problems with my Alhambra clover print fabric.  The sewing the arms flat first thing was a surprise to me as well as the match the lightest thread color.  And actually I disagreed with that last point for my specific fabric print.  I, unfortunately, do not own a flat fell foot as it did not come with my machine, but will consider getting one for the future.  But fortunately, my little boy’s shirt pattern does not require flat felled seams as the seam allowances are only a 1/4 inch, much too small for a flat fell seam finish.  

I had my sewing lesson with Thea last night and we started work on the shirt.  When I cut out the fabric, I cut in a single layer so as to match the print as much as possible.  I am using a check fabric, or is it gingham?  I can’t see what the difference is between the two.  But despite my careful cutting, I still did not get a perfect match.  I’m kind of bummed about that.  The feed dogs just didn’t want me to match I guess.  Not sure what else I can do to counteract this, except to whip out the walking foot.  Any suggestions?   I pinned the heck out of it.  

Matching fronts, left and right, with button placket


back yoke seam, almost matching


As for thread choice, I went with a navy thread even though David Coffin suggests white when white is present.  I just thought it blended better.  Here’s my test swatch. 


So far I have interfaced the parts that needed interfacing, the collar and stand, and the button hole placket.  I used Pam Erny’s interfacing.  I really like her interfacing but can’t speak to competitor stuff as hers is the only kind I have ever used.  For the placket, I probably should have cut the interfacing in half because you double the placket over itself, thereby doubling the interfacing and it became too stiff.  Live and learn. 

I opted not to interface the pocket and am pretty proud of my placement.  It’s perfectly matching on one side, and just a little off on the other.  The topstitching isn’t too bad either, but again, not perfect. 

pocket placement


That’s where I left off last night.  I have to attach the yoke to the fronts now.  Working on that tonight.  Wish me luck! 

Happy sewing everyone.